Tuesday, 13 December 2011

The niteatures have arrived for Christmas

What a week in Scotland  the wind was so bad,  particular up in the Cairngorms and the highlands which was made even worse by snow, luckily as we are on  the coast  it was only trees that came down and so I decided that since there was only one or two bits  to pick up for Xmas and having just spent 2 hours in the post office with parcels, I was locking myself away for the weekend and trying to finish off projects.

I found some great fabric panels which look like like vintage library books, 10 minutes later they were needle cases, they were so easy to do


The bag obsession continues and I finished off a little girls bag with a gingham lining


Among the unfinished projects there was a Cath Kidston kit to make a bag, surprise surprise !!!!. I added an extra touch by adding in a floral lining to finish it off.


Now I may be able to sew but I have to say one of the skills I have never mastered was knitting, squares seemed to be as far as I ever got and I have a fab wool blanket to prove it which I will feature at a later date.

Now I have bought the knitting books, watched my mother but no I have still not improved. So I was wondering what to do with all the squares and spare bits of wool to and that's when the niteatures (knitted creatures) were created. I also used up some scraps of liberty fabric for the stomach and the ears and added a fluffy tale, so here are the first couple of attempts


Last but not least I was working on 3 different quilt tops and the Snoopy quilt was coming along nicely, all will be revealed in the next blog. So off for now to have a mince pie and cup of tea

Monday, 5 December 2011

Cup of tea, mince pie and fabric printing

Today has been a busy one, not only have I had several cups of tea and mince pies but I have even managed to squeeze in putting  together my visual diary of all the print techniques I have tried over the last few months.

I have now pulled together some fabrics to use on projects, all these have been designed and printed by myself and will be turned into bags and purses.

The first collection are all designed and hand painted


For the second collection I have used vintage magazines, letters and adverts which I turned into screens which I then printed on fabrics. This this fabric will be used to make purses and bags.


Now the exciting part is planning my vintage range for next year !!

The online shop has arrived at last

Well after months of thinking about it now I have took the plunge and set up the shop on Folksy the British craft sellers website.

I have started with a few items to see how things take off and develop the range  but let me know what you think

http://www.folksy.com/shops/sewingthethought

Monday, 28 November 2011

The facebook page has arrived

I have now set up a facebook page dedicated to Sewing the Thought and will link the blog as well as adding lots of photos and comments.So search for the Sewing the Thought page on Facebook and click on the like button and you will get all the updates and blog links

Will eventually add the like button to this page, but one step at a time !!!!

The button obsession continues

Well after yesterdays blog update I thought that would be it for the next few days, but oh no that was not to be the case I was on a role and  I decided to have a tidy up of the corner of the spare room where I keep all my art and craft materials.

The things you find stuffed away in boxes and this time it was some buttons kits which just need to be covered in fabric. So off I went to the scraps box and located lots of little bits of fabric and turned them all into buttons which I can use on my new bag collection.


Now if you think that was it, oh no I was becoming obsessed with the scraps box and found some lovely chintz fabric which was just crying out to be made into something. As it was evening and too late to get the sewing machine out and I was also wanting to chill out on the sofa, so decided to stitch this by hand and made a little pouch to carry my sketch book and pencils. This will fit into my bag and stop the edges of the sketch pad getting damaged.

By then it was time for tea and hot buttered toast and bed, but then I spotted my fabric designs from last week and thought I could leave that to the next blog,so as they say in TV  to be continued.......................

Sunday, 27 November 2011

Buttons, Buttons everywhere

Its been a busy weekend on the craft front. I have had  a couple of days holiday and the weather was cold (even a flurry of snow this morning) so I decided to have a quiet long weekend at home and get busy with my projects.

First up were some new Christmas decoration which are a great way of using up all the buttons that seem to accumulate in the sewing box. Hearts were cut out of red and grey felt, and a collection of buttons were sewn on one side of the one of the hearts. The pair of hearts where then hand sewn together and then stuffed with toy stuffing and a ribbon added. You can use any combination of shapes, colour of buttons and colour of felt and ribbons to make a great collection of decorations.


Next up were  a couple of little lavender bags that can be popped in among your laundry, this was great way of using up some bits of tartan wool that I had in my scrap box. I even added on a little unusual button that I had bought some time ago and hid  in my sewing basket


My final project of the weekend was a few more bags to be made up ready for setting up the shop on Folksy/Etsy. I decided a couple of week ago that it time to build up a stock of products to get ready so here are a few samples


Oh there are still lots to go what a busy weekend !!

Tuesday, 15 November 2011

Christmas is coming, PANIC!!

I was just planning the next few weekends and realised how close to Christmas we are and a minor panic set in. So much to do and so little time.

Christmas is a great time for turning craft projects into gifts but of course that takes time, so I a decided to have a real focus on the weekend projects.

This weekend was gift tags and wrapping, I use luggage labels in all colours then decorate them with stickers or stamps  and same goes for plain wrapping or brown paper and in under 30 mins I had a great little collection going


I also hunted through this years craft projects to see what I could make good use of. In an earlier blog I mentioned the ribbon brooches that I had made, well a collection of them brightened up an plain bag.

So a great shopping companion and something to carry all the christmas pressies in.!


Saturday, 12 November 2011

To print or not to print !

It seems such a long time since I last updated the blog,  but I have been so busy I now have a host of projects to update you all on so I thought I would do in all in one big page.

Well I cannot believe it but there is only a couple of more weeks to go and my first term at art school will be over. I have absolutely loved doing the textile course and learning all the techniques in printing, fabric and colour and the group on the course have been great and we have really been bouncing ideas off each other.

I have spent this term not only learning all the different process's but also trying  lots of different designs to find a theme I want to work on, I have also have loved designing and making stencils.  Next term we are looking at building our portfolio ready for our exhibition and I have a few ideas I am working with and suprisingly they have a vintage theme. I also have to decide with I want to focus on interiors or fashion, oh the decisions!!


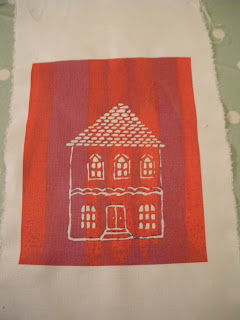
I have found freehand work very calming but with interesting results as you can see from the pic my tulips are not perfect but I kind of liked that but it was really time consuming and you had very little control over the final look.

Tried a couple of techniques with stencils this week, using a pre dyed  fabric and using a discharge technique to strip the colour out  and leave the pattern  we also used a similiar version that replaces it with a colour. This has been the favourite of mine up to now. I enjoyed doing the arabian stencil  which turned out to be really intricate after it was drawn.It was also great to try different types of cotton fabrics to see the varying results.


I even managed to try a few colour combinations to dye the fabrics and it resulting in some interesting combinations.


Lookin foward to exposing images on a screeen this, so look for next weeks results

Monday, 17 October 2011

Red and Yellow and Pink and Green, Orange and Purple and Blue!!!!

Well what a surpise I had this week. I sat down with a cup of coffee and my latest edition on Making magazine opened to the page called making views about what people have been upto and  thought a picture looked just like a project I had featured in my blog, I read the text that went alongside it I realised it was my project and  actually comments from my blog and the blog address.  It really made my day

Well I have survived the first few weeks of my textiles course and it has been great fun. We are a real mixed bunch, some are students putting together their portfolios and others like me who just want find a new creative release.

For years I have been working with some great ranges of fabrics but having to design some to print is a whole different ball game. We have been asked to keep a visual diary throughout the year with our designs and inspirations, this is something that I have been doing for many years, so I decided my mood books would be a great starting point but oh dear all I can say is my thought patterns are all over the place and they cover everything!!!!. But what stands out is a great love of the autumn and winter months and of landscapes and buildings so maybe this could be the theme of this collection. Who knows watch this space

Anyway we had to start somewhere on our first prints and so I decided to stick with an easy floral pattern. It was the mixing of the colours that turned out to be the really interesting bit and was a case of try it and see and oh my what a collection of colours we produced and also trying different types of fabric were really interesting to see the different results. All our aprons and hands looked like a finger printing class at Nursery.  Anyway here is the first sample print!!!!!


This week we are looking at a completely different technique and looking for a landscape style print and  I am thinking of using this picture that I took last year in monument valley while doing a tour in the states.


So lets wait and see what we can produce

As for the sewing  well I am currently working on a project I have named the Guilt Quilt. All will be revealed in my next blog

Tuesday, 4 October 2011

The wonders of the scrap's box

It has been a manic couple of weeks and it was also back to school for me this week as I started my textiles course at art school. I am really looking forward to learning new techniques and mixing colours and building my portfolio of fabrics ready for our exhibition next year, it gives me a great chance to think about what I can turn the fabrics into and I am sure that lots of my efforts will appear on these pages

As for my current projects, I have lots of quilts and embroidery on the go at the moment and they are all currently in progress which hopefully will feature in the blogs over the next few months. I suddenly realised my scraps box is growing bigger and bigger and I was wondering what to do with some of the Christmas fabric scraps as they have limited use the rest of the year so decided to turn them into little fabric parcels to hang on the tree. They are little squares sewn up, a ribbon added  and filled with soft toy stuffing and a few drops of Christmas aromatherapy oils. Its a great way to use of bits of fabric left over from projects


With the other scraps I have made little gift bags which can be filled with a chocolate or a little gift, tied with a ribbon and they can be hung on the tree.

Another project  for them is to make 25 little bags add a number 1 - 25 on the bags either by embroidery, applique or fabric paint, add a chocolate and tie with the ribbon. In the meantime find a branch that has lots of twigs on it, this can either be left natural, or painted white or sprayed gold or silver. Then pop the branch into a large vase and then hang your little bags on the branches.

Oops , I now need to go off and finish the Christmas table runners that I started on earlier this year as I have ended up with a few requests from people for Christmas orders. Better get stitching!!

Tuesday, 27 September 2011

Nothing like a baby on the way to make you sew faster!

Earlier this year we had family news of a baby on the way, my cousin was to become a dad in early Oct. Great I thought that's months away and I had plenty time to make a gift. Since we knew that it was to be a baby girl I could even pick the colour of the fabrics.

Well as the saying goes "doesn't time fly when you're enjoying  yourself"  couldn't have been more true.I had just realised it was September  and I didn't have much time left so I needed to spring into action.

My first thought was a cot or pram quilt, it was a compact size, it could be personalised and light enough to post (it was going to Italy). But of course I don't like making life easy for myself so I decided to alternate each patterned square with a square of embroidered fabric. So I hunted the craft cupboard for some fun baby motifs and to make it even more difficult I wanted one of the panels to be in Italian.

Well eventually patterns were found, fabric pressed and a square was embroidered each evening .(I managed to multi task by catching up on the TV, drinking red wine, chatting on the phone and sewing!!!)
It took a just over a week to  complete  the embroidery work and then over the weekend the quilt was sewn by hand, binding cut and pressed, pure cotton wadding purchased and the complete project assembled and then embroidered to bind the layers. It was even  finished off with some of the new labels I have made.

Luckily it was all completed in time as baby arrived this morning !!!!!.

Now I just need to post


Sunday, 18 September 2011

A girl can never have too much glitter or vintage trinkets

I was actually thinking of naming this blog "They have mince pies in the supermarket already!!!".  I was out shopping the other day and they were clearing away all the school sale items (we go back to school in early August here in Scotland), and they were replacing them not with Halloween Items but with Christmas Biscuits and Mince Pies, it is only September!!!!!, I'll be hearing Christmas Carols in the shops soon.

Anyway it got me thinking about starting the Christmas Projects for this year and since I have a few ideas for projects already in my note book Idecided I needed to get a move on. I have also signed up to do a course at the School of Art next to where I work which will take up a fair bit of my spare time. I am really looking forward to it as it is a printing course for textiles for Fashion and Interiors, and I will keep you updated on how I am getting on and hopefully turn some of my designs in projects.

So back to the Christmas projects, I was out at a vintage fair a couple of weeks ago and have collected a load of vintage Christmas Cards and a few little trinkets to use in projects and was wondering on the best way to display them and came up with the idea of using old jars.

As you can see below I have used a kilner jar for this project. I have popped a  card inside the jar and added some glitter. Once the lid was locked. The jar was shaken up to disperse the glitter.

Round the neck of the jar I added a vintage ribbon and had threaded through it a 1920's dress clip. The ribbon was then tied around the neck of the jar.

A collection of these jars in different sizes look great grouped togethe, if you don't have vintage Christmas Cards you can use postcards in a vintage style like the one I have used in the picture below or use a Family photos. Since you can't put tea lights in the jars, I normally sit a tea lights behind the glass to give a fab glow .

Easy and quick to make


Tuesday, 13 September 2011

I think I was a bag lady in a former life !!

After last weeks creation with the tea towel, my bag adventures continued.

Over the last couple of weeks I began to think that maybe at some point in my life I had become obsessed with carrying my life around in bags, hence the need to make so many of them. I always seem to carry around at least 2 when out and about on my travels, one of which is full of books and magazines.

So after finishing last weeks blog update I started on making a book bag for my frequent library visits (always on the look out for new craft books) and I ended up making 4 bags in total. So now I know what I will be making everyone for Christmas.

Once I started on making the bags I was on a roll and again this is a really easy project using just 2 rectangles of main fabric for the bag and 2 rectangles for the lining and a couple of strips for the handles. After sewing up the bag  and the lining and then popping the lining inside that bag hemming the top and making and adding the handles it took less than an hour.

Though I have to say in my enthusiasm with the sewing machine there was an incident with a flying snapped needle , luckily I was wearing glasses otherwise I would have been making a decorative eye patch !!

Anyway you can see my creations below. The chintzy fabric now resides with my mum as it's more her style


The Cath Kidston fabric bag is ideal for my shopping


The little bag is made from a Rob Ryan print fabric from the fantastic clothkits company, where all the patterns come ready printed onto the fabric so are fantastic for the beginner and you can find them at

www.clothkits.co.uk


I even managed to use the piece of embroidery a did a few weeks and turn that into a bag to carry around my projects. A piece of natural linen was turned into a square bag with a drawstring and then the embroidery was hand stitched on.


Now look out for my next blog trick a special baby's pram quilt that required a quick finish!!!

Thursday, 8 September 2011

50 things to do with a Tea Towel before you die !

Well the one thing a tea towel really doesn't gets used for in this house is drying dishes, I no longer have a dishwasher so I now go for the air drying method much better in my opinion and less work for me so more time for crafts.

So what has that got to do with crafts and sewing you may ask, well this is the strange way my brain works. I was having a sort out of the kitchen cupboard and came across a pile of tea towels that had never been used, but I must have liked the fabric as its not exactly the sort of thing I find myself out window shopping for on a Saturday afternoon.
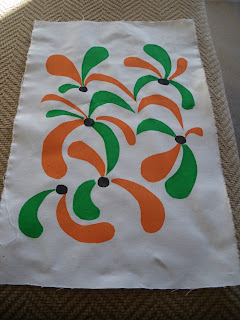
Anyway I wondered what else I could do with these tea towel's and that's when the idea popped into my head, I have taken to carrying around a little fold away bag in my handbag for when I go shopping, I keep telling myself its about being environmentally friendly but it's more likely to do with getting older. Its then that I realised that these tea towels were ideal for turning into shopping bags, strong fabric and already hemmed, a few snips with the scissors and a few folds and a quick stitch and magic an ever lasting shopping bag.

This one has also got a pocket on the front.